


DIY
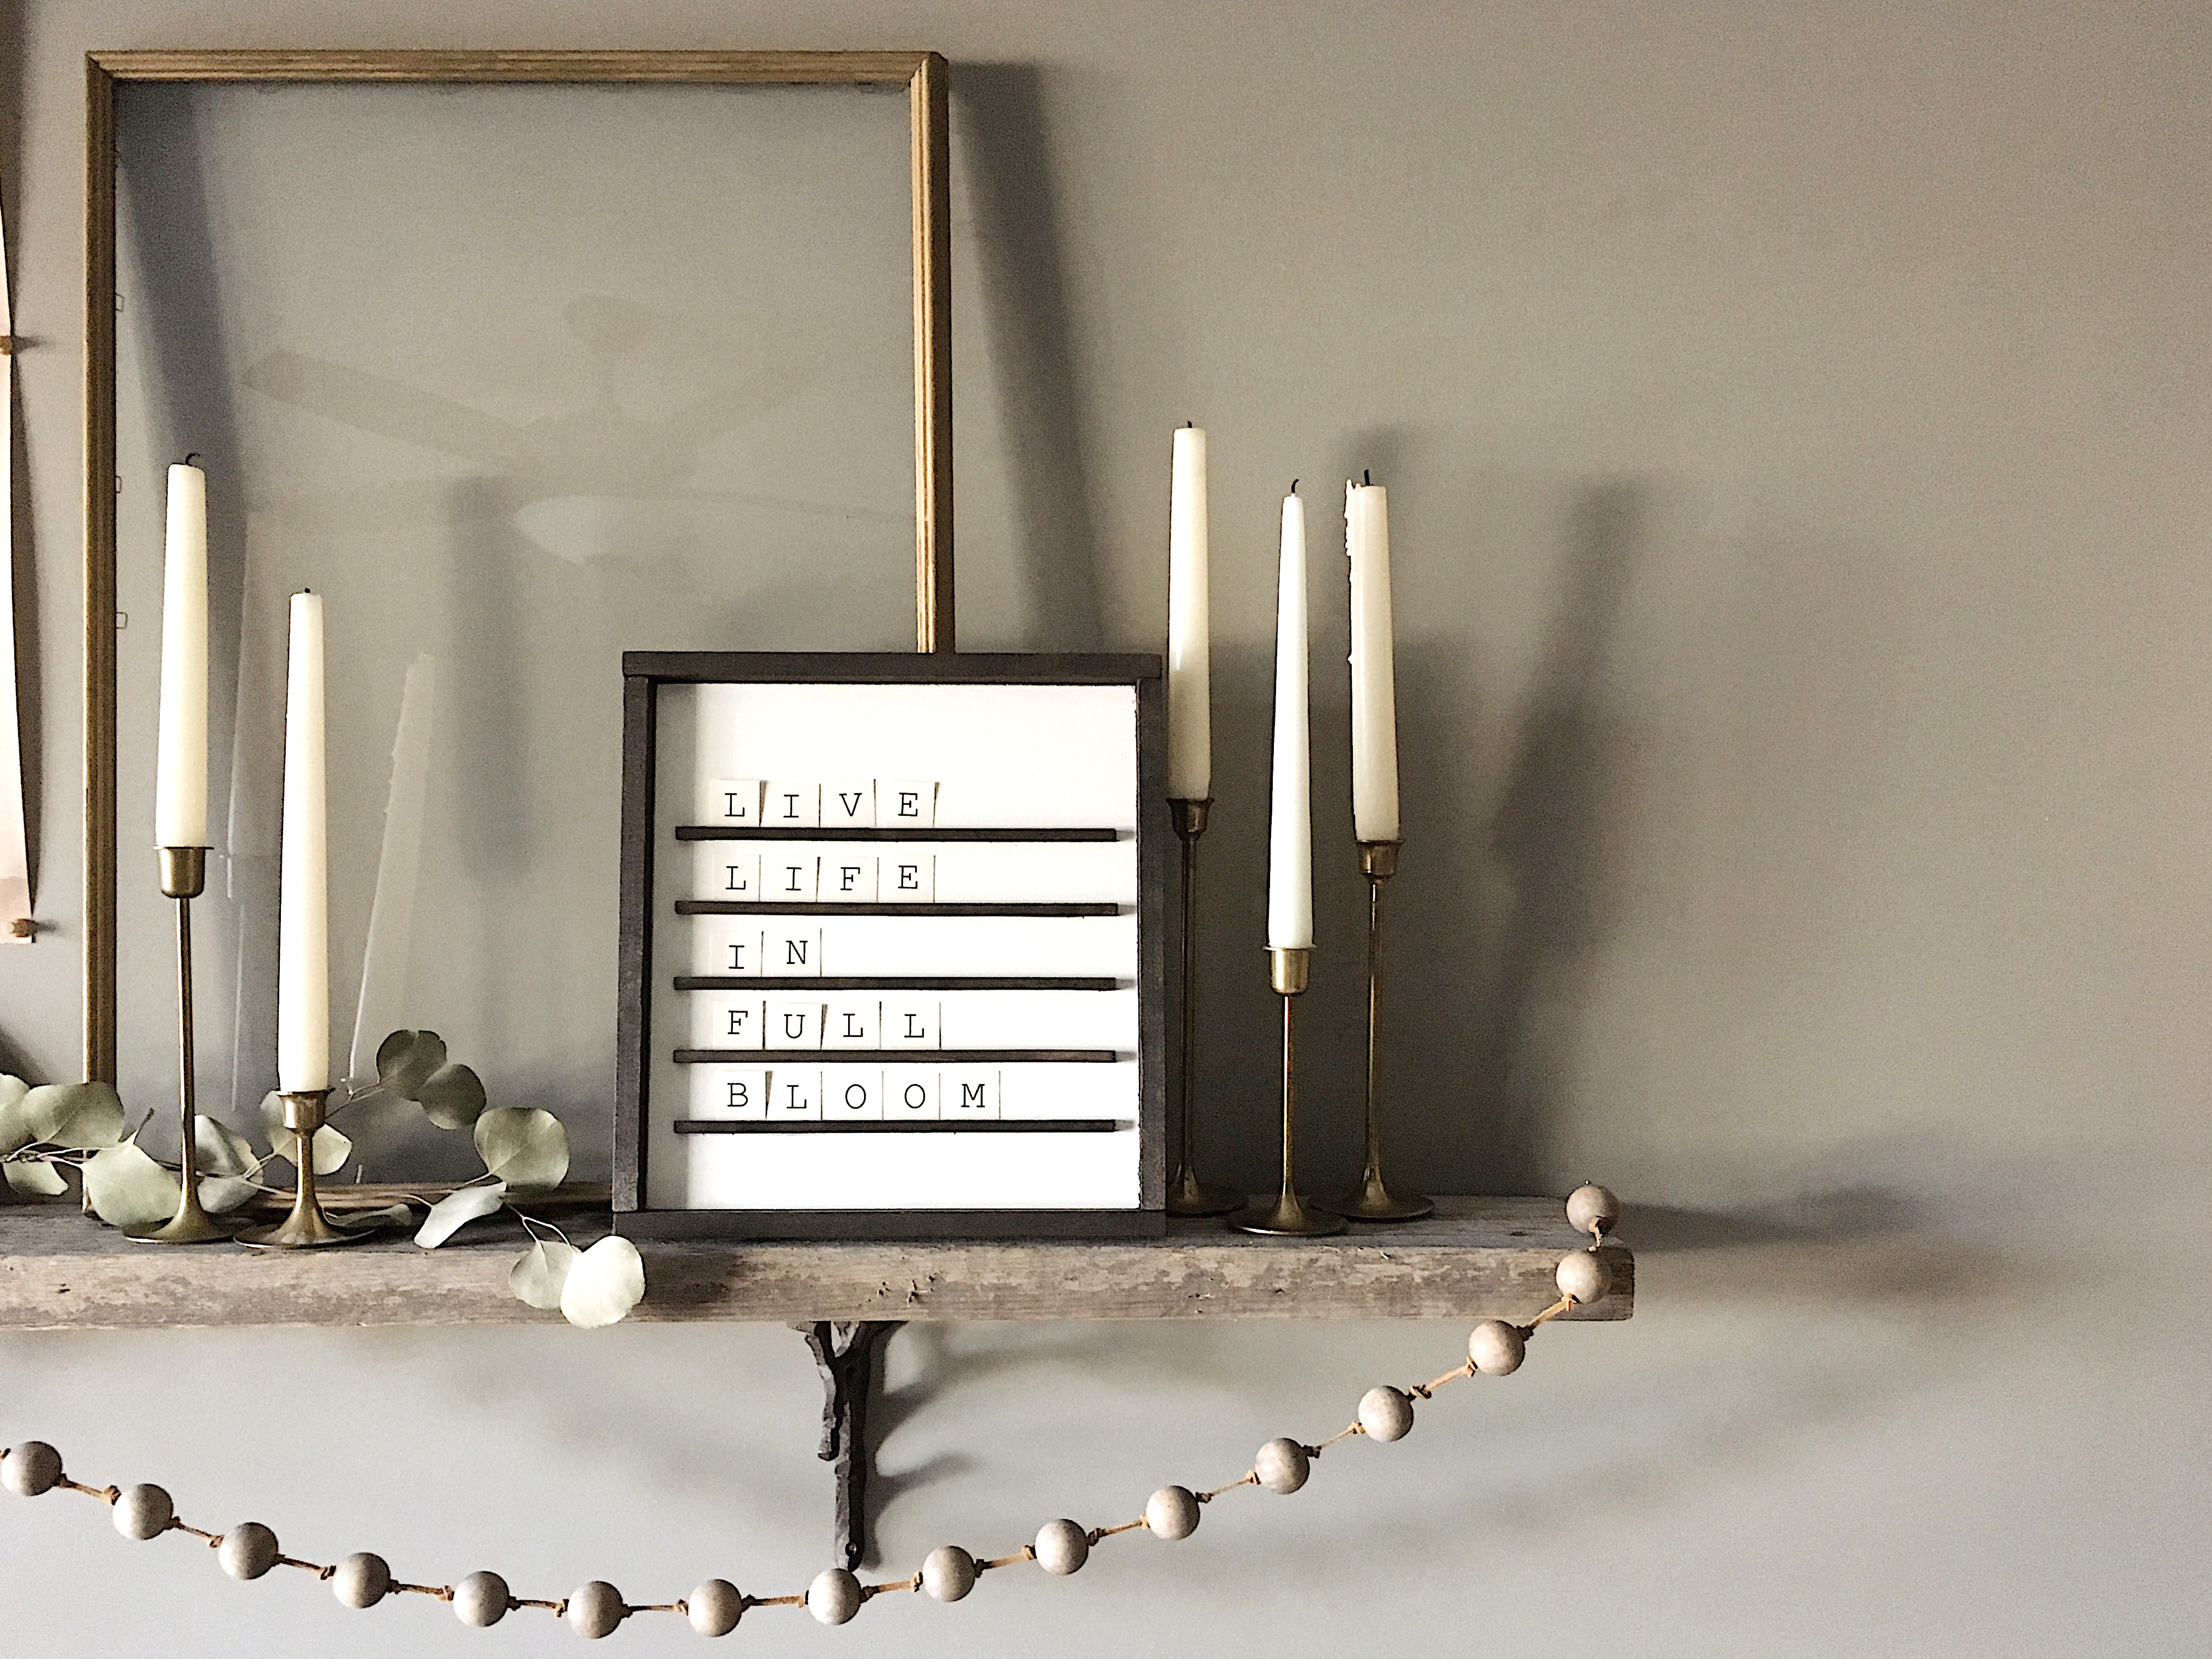
Wood Letter Board
Letter boards have become increasingly popular & we are loving the trend; however, we are not always loving the price!
So… we took to our ReStore aisles to see if we could find materials to create our own version of a letter board. We ended up finding all the materials we need to create this DIY project, along with some items you probably already have laying around your home!
Here’s how we did it!
For this project you will need:
• particleboard (cut to 10″ x 11″)
• square wood dowels (½ ” x ½” – 5 cut to 9″)
• wood trim (1” x ½“ – 4 cut to 11″)
• paint + stain + wood glue
• paintbrush + old rag or sock
• hammer + finishing nails
Remember, you can customize your letter board to any size you want and figure out your own measurements. This is the true beauty of doing it yourself!
step one:
Take your paint color of choice & cover the front side of your particle board with a layer of paint. To get the color you want, add as many coats as you need.
Between coats, also start staining your wood pieces. Use your rag/sock (& gloves, if desired) & dip a small tip into your stain. Remember, a little goes a long way!
step two:
After all of your painted & stained pieces are dry, we’ll attach the ‘frame’. This can prove more difficult than it sounds, so here are some tips:
- START WITH YOUR FLUSH BOARDS!! This is very important! By this we mean, attach 11″ boards that lay flat to the edges of your board first! Then attach the 11″ overlapping boards to complete your frame.
- Hammer a guiding nail on a flat surface before attaching them to your board. This will give you a better start & better luck when attaching the sides together.
step three:
Now we will be attaching the letter rails to our board. Beginning from the bottom of your board, use a ruler to measure evenly spaced gaps between your letter rails. (We measured a 1.5″ space between ours.)
With a small amount of wood glue place the boards in place. Make sure they are straight & set a book over of the rails to hold them in place while the glue drys.
step four:
We created our own typewriter style letter board letters for our board by cutting out letters printed on cardstock paper. Here is a template if you would like to use those as well.
OR these boards are created with spacing that can fit Classic Scrabble letters, Bananagram tiles or wood tile letters you can purchase at the craft store.
AND… You’re done!!
We hope you are able to follow this tutorial to create your very own, personalized letter board!
If you do, please tag us in your photos so we can see what you were inspired to create & display in your home.
And remember, the ReStore can be a great resource for many of your declutter, renovation, DIY & home needs. We can pick up items you want to donate, we offer gently used items that can spark joy & serve a purpose in your home, and sell supplies you may need for any remodeling, renovation or DIY project you want to complete!
DON’T MISS OUT!
If you want to see more ReStore bargains & home decorating tips, join our email list! We send out a weekly Bargain Beat where we share what we believe to be the best ReStore deals & home inspiration.