


DIY Projects
You never know what you’ll find at Omaha’s Habitat ReStore, which makes it the perfect place to go for DIY project inspiration! On one trip you might see a dresser that is begging to be turned into a functional bench; on the next you could find a great light fixture that only needs a new coat of paint to make it pop. Scroll through some of the projects we’ve completed below – and follow us on Pinterest – to get your creative juices flowing!
Click on a project to be taken to the tutorial.


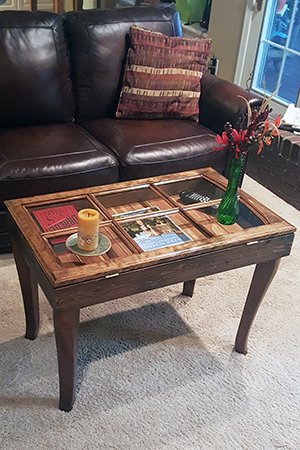
Window Top Coffee Table
Supplies
- An old window
- 2 x 4’s
- Old paneling*
- Table Legs
- Hinges
- Stain or paint (optional)
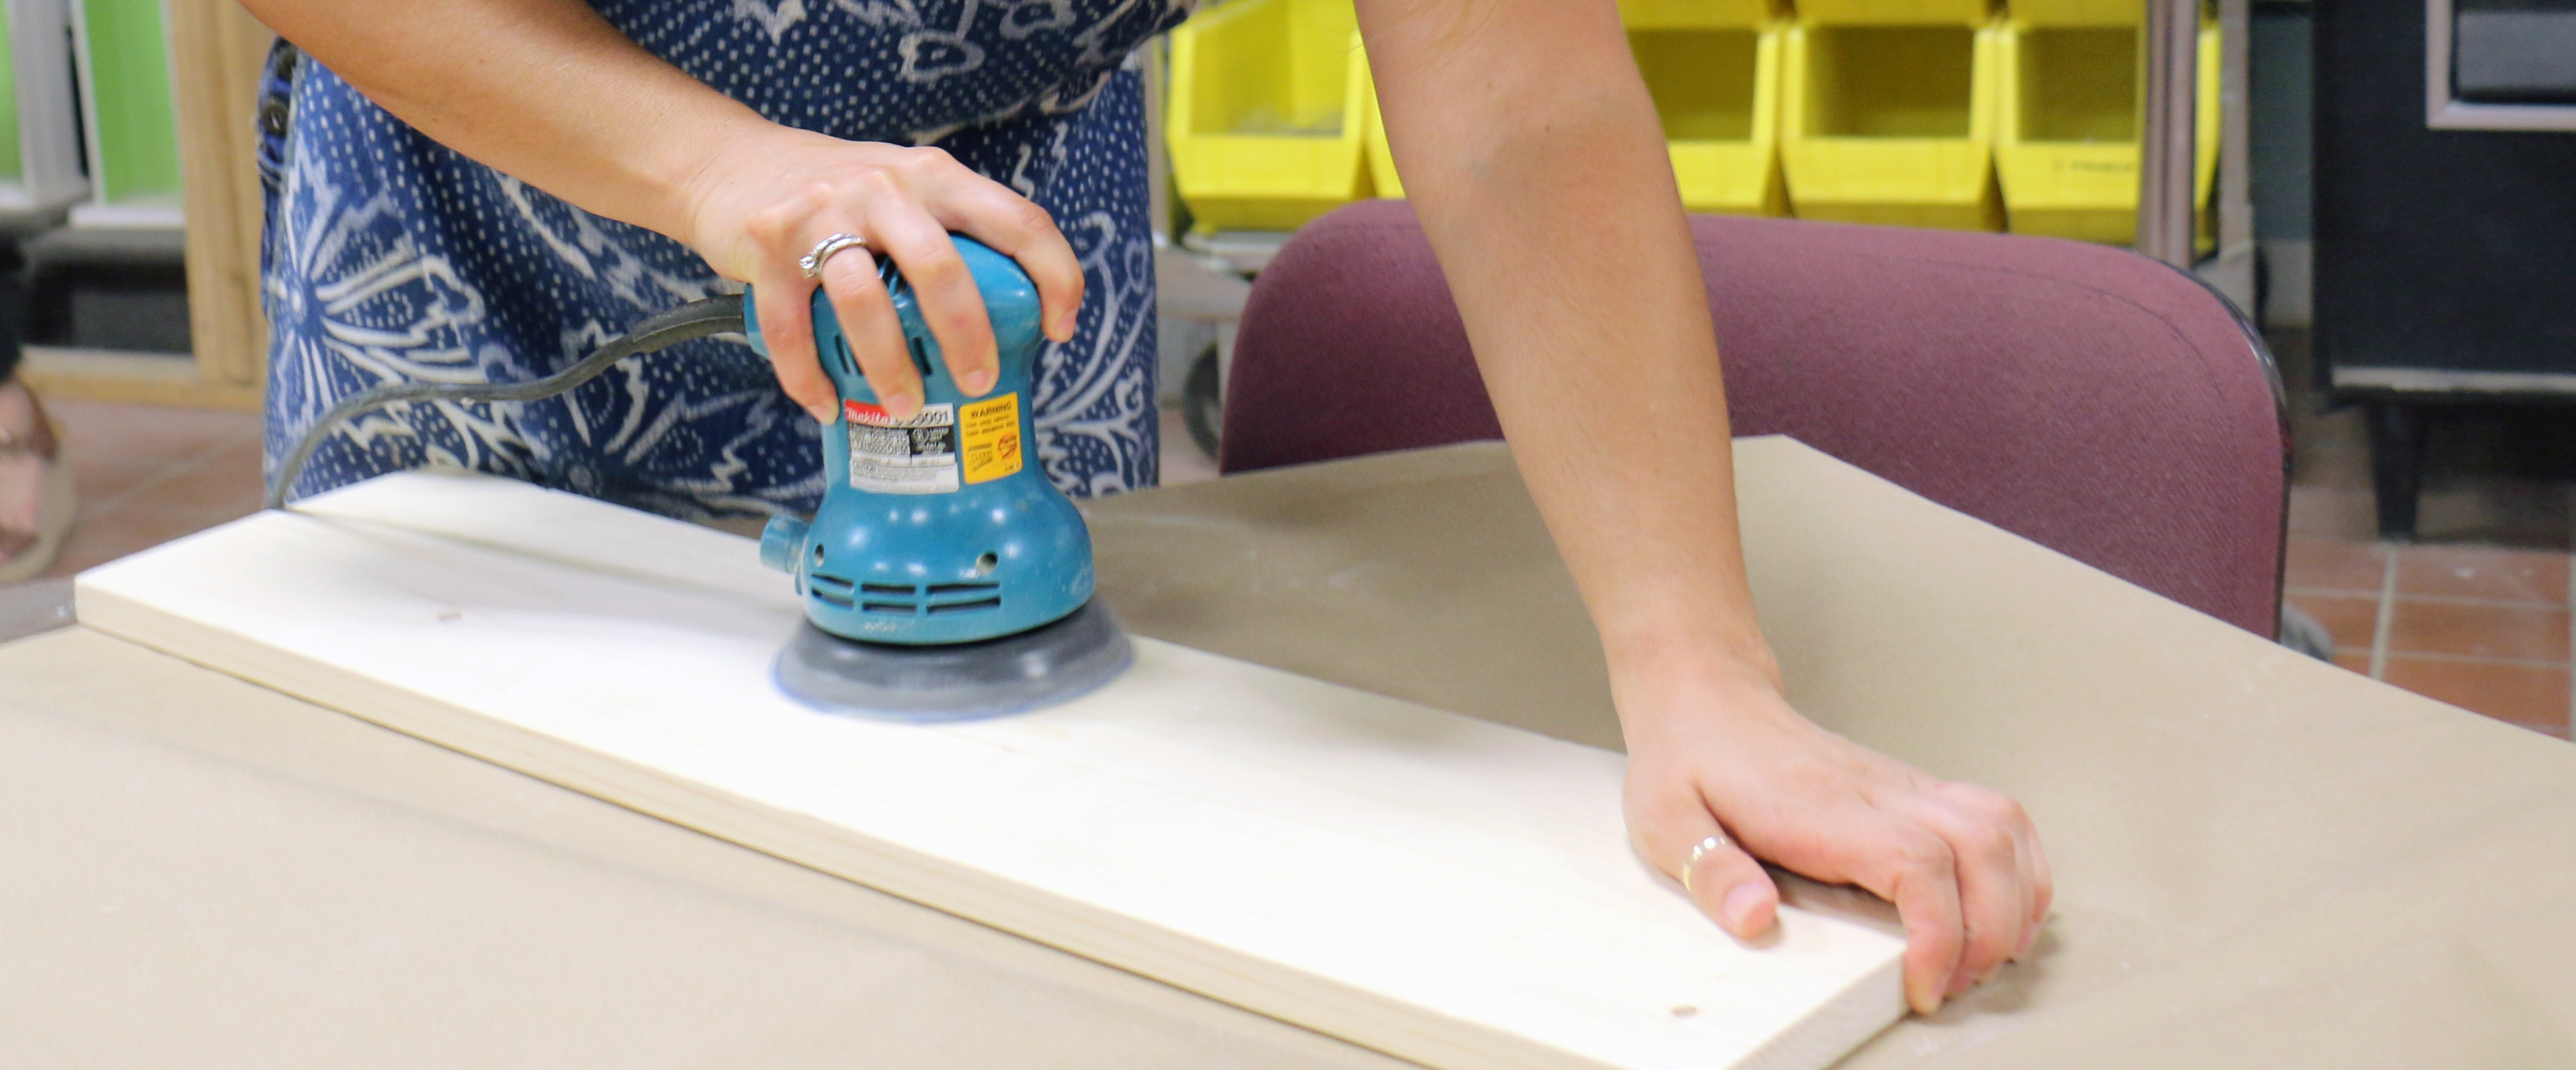
- Sander and sand paper
- Electric drill
- Bolts
- Washers
- Nail gun*
- Wood glue
- Thin scrap wood …
Instructions
- Tape the glass with painter’s tape to protect it from sanding.
- Sand old finish, paint, and stain using sandpaper. (We used 100 grit on an electric sander.)
- Dump the majority of sawdust off of the window. Use tack cloth to pick up small pieces of sawdust.
- Decide if you want your coffee table to have a lip for opening and closing, or if you want to add a drawer pull, and make the window flush with the table frame (leave about 1” if you do not want a drawer pull). For this tutorial, no drawer pull is used. …
Get the full material list and instructions by downloading our handy tutorial sheet!
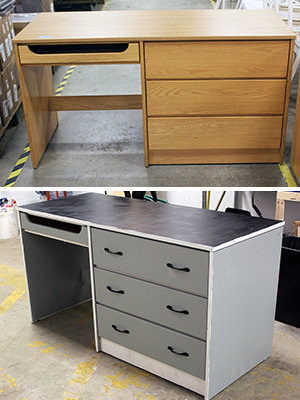
Easy Desk Remodel
Supplies
- Desk to remodel
- Paint primer
- Paint (flat or glossy)
- Paint brushes and rollers
- Electric drill
- Drawer pulls with screws (optional)
- Spray paint (optional)
- Polyurethane (for paint sealing)
Instructions
- Take drawers out of desk, and take off all hardware. Make sure the desk is clean.
- Paint a thick coat of primer on the desk and drawers and let dry completely.
- Paint your desk to your liking! We did chalkboard paint on the top, grey as the main color, and white for accents. Feel free to get creative! Let paint dry completely.
- If you’re adding drawer pulls, take measurements of where you want the pulls on the drawers. Use a pencil to mark. We had our drawer pulls 5” in from the edge of the drawer with about 9” between the two pulls. Spray paint drawer pulls to match your desk’s color theme.
- Drill holes for your drawer pulls.
- Put the screws in the holes from the inside of the drawer. Using a screwdriver, attach the drawer pulls.
- Paint a coat of polyurethane on entire desk to prevent paint chipping.
- Re-attach hardware to the drawers, reassemble the desk, and put it to good work!
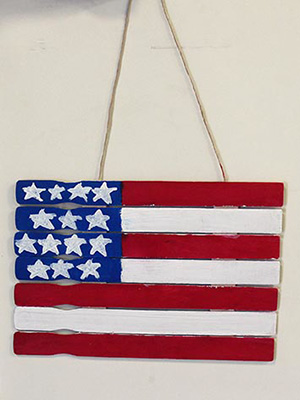
Paint Stick American Flag
Supplies
- 9 paint sticks
- Red, white, and blue acrylic paint
- Mod podge
- Twine
- Scissors
- Glue gun
Instructions
- After gathering all of your materials, lay seven paint sticks down in a row. Trim the remaining two paint sticks to the length of the paint sticks that will be the flag. These are your supporting paint sticks.
- Trim a piece of twine that will be used to hang. Glue the twine between the top paint stick and the back supporting paint sticks. Allow glue to dry.
- Putting the back support forward, glue on each paint stick individually using the glue gun.
- Using a straight edge, draw a line for what will be blue.
- Paint your flag! We used two coats of acrylic paint to get the look we desired.
- Free-hand a few stars in the blue, or use wooden stars from a craft store.
- Paint a coat of Mod Podge on to seal the paint, and let dry.
- Hang your paint stick American flag for everyone to enjoy!
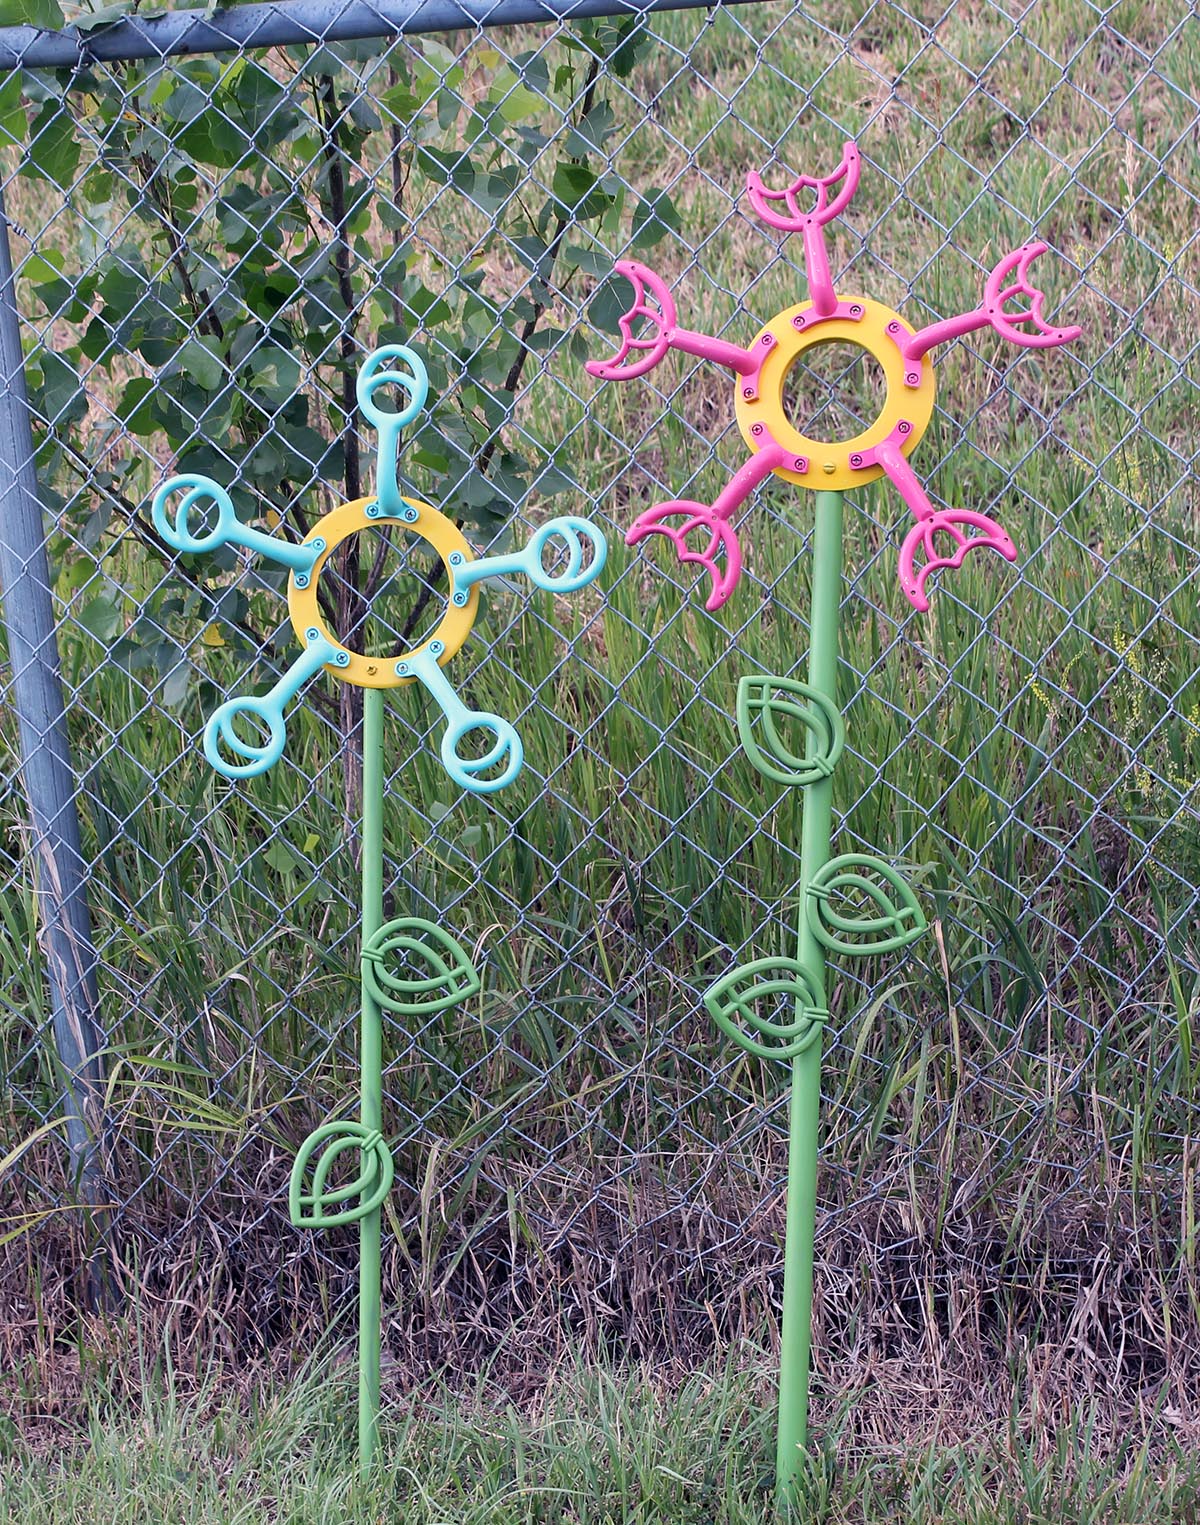
Fan Blade Garden Art
Supplies
- 5 fan blade brackets for petals
- Recessed lighting trim
- 2-3 fan blade brackets for leaves
- Metal fan pole
- Pencil
- Electric drill
- Safety glasses
- Vice
- Spray paint
- Spray paint sealer
- 10-15 screws (Screws will vary in length and amount needed dependent on type of fan blade bracket and metal fan pole.)
Instructions
- After gathering materials, decide where you want the petals and leaves to be on the recessed lighting trim and metal fan pole. Using one bracket as a guide, mark with a pencil where you need to drill holes for the brackets to be attached in both the lighting trim and the metal pole. Repeat five times or number of petals and leaves you have. Note: You will need to drill an additional whole in both the metal pole and the lighting trim in order to attach the two pieces together.
- Use a vice to secure the metal fan pole and lighting trim. Wearing safety glasses, drill holes in the marks you made earlier. Use a drill bit that is slightly smaller than the screws you will be using. (Ensures the screws are screwed in snugly.)
- Spray paint your parts how you choose. Let dry for one hour.
- Spray a coat of spray paint sealer on all your parts. Let dry for one hour.
- Attach fan blade brackets to lighting trim using screws.
- Attach top of flower to metal pole using a screw.
- Attach petals to metal pole using screws.
- Stick in your garden and watch the flowers grow around it!
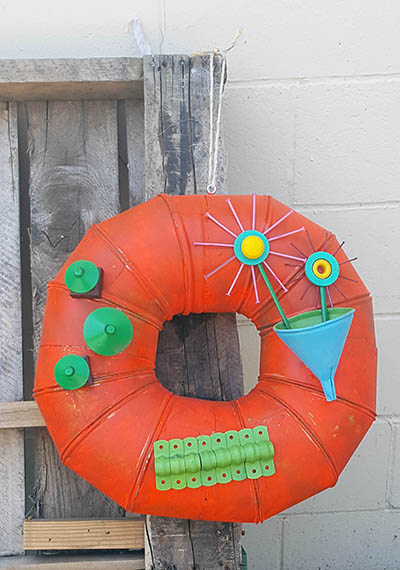
Hardware Summer Wreath
Supplies
- Four 6” elbow duct pieces
- E-6000 glue
- Twine
- Small eye hook
- Electric drill
- Spray paint
- Spray paint sealer
- Hardware supplies of your choosing. We used: 11 large nails; 12 small nails; 2 large washers; 2 drawer pulls; 8 conduit fasteners; 2 Allen wrenches; small funnel; 3 suction cups; 3 stair flat shoes
Instructions
- Glue two of the elbow pieces together with E-6000 glue. Repeat with other two elbow pieces. Allow at least an hour to dry.
- Glue the two halves together with E-6000. Allow at least an hour to dry.
- Using an electric drill, drill a small hole (smaller than the eye hook) in the center of the top of the wreath.
- Screw in the small eye hook until snug. If, while you’re in this step, the two pieces of duct work appear to separate, keep screwing the eye hook down, and the two duct pieces will come back together.
- Spray paint your hardware. For the wreath, we did one coat of bright orange spray paint, then a coat of orange acrylic paint to achieve the rustic look we wanted. Allow to dry completely.
- Spray all contents of wreath with spray paint sealant and allow to dry completely.
- Create whole pieces to be put on your wreath. Flowers can be made by gluing nails onto a washer. Then, glue on an Allen wrench for a stem. Finally, glue the entire flower into the funnel for a “flower pot”. We also made trees out of stair flat shoes and suction cups. Allow pieces to dry completely.
- Glue whole pieces onto wreath in the fashion you want. We created a caterpillar out of conduit fasteners!
- String twine through the eye hook and tie in a square knot at the top.
- Hang your hardware summer wreath for everyone to enjoy!
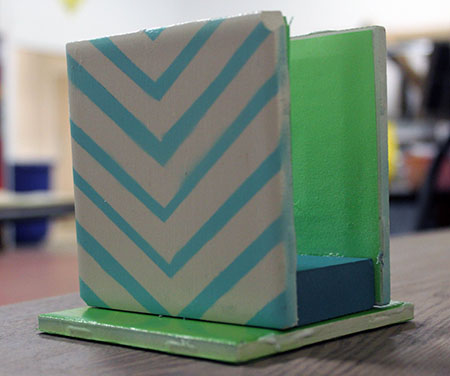
Tile Napkin Holder
Supplies
- Three 4×4 tiles
- Spray paint (You can also use acrylic paint, Sharpies, etc.)
- Paint brushes
- Mod Podge
- Small piece of scrap wood, 4″ long
- Felt (Ideal for protecting the surface you set it on, but paper can also be used)
- Spray Adhesive (If you have a favorite crafting adhesive that would work, use it!)
Instructions
- Use spray adhesive to attach your felt or other material to the bottom of the tile. Whatever you use for the bottom of the tile is supposed to protect what is below the napkin holder.
- Decorate your tile! We used tape to make a chevron design and then spray painted the tiles. You will also want to paint the scrap piece of wood as it will be visible on the finished product. Let your paint and other decorations dry completely.
- Use Mod Podge as a sealant for the paint. Paint a coat on, and let dry completely.
- Using spray adhesive, glue the scrap piece of wood onto the middle of your napkin base and let dry.
- Using spray adhesive, glue the side tiles to the block of wood.
- Use a vice to pinch the tiles against the wooden block. Leave for 24 hours to let the glue bond completely.
- Put napkins in your new holder and enjoy the meals that will surround it!
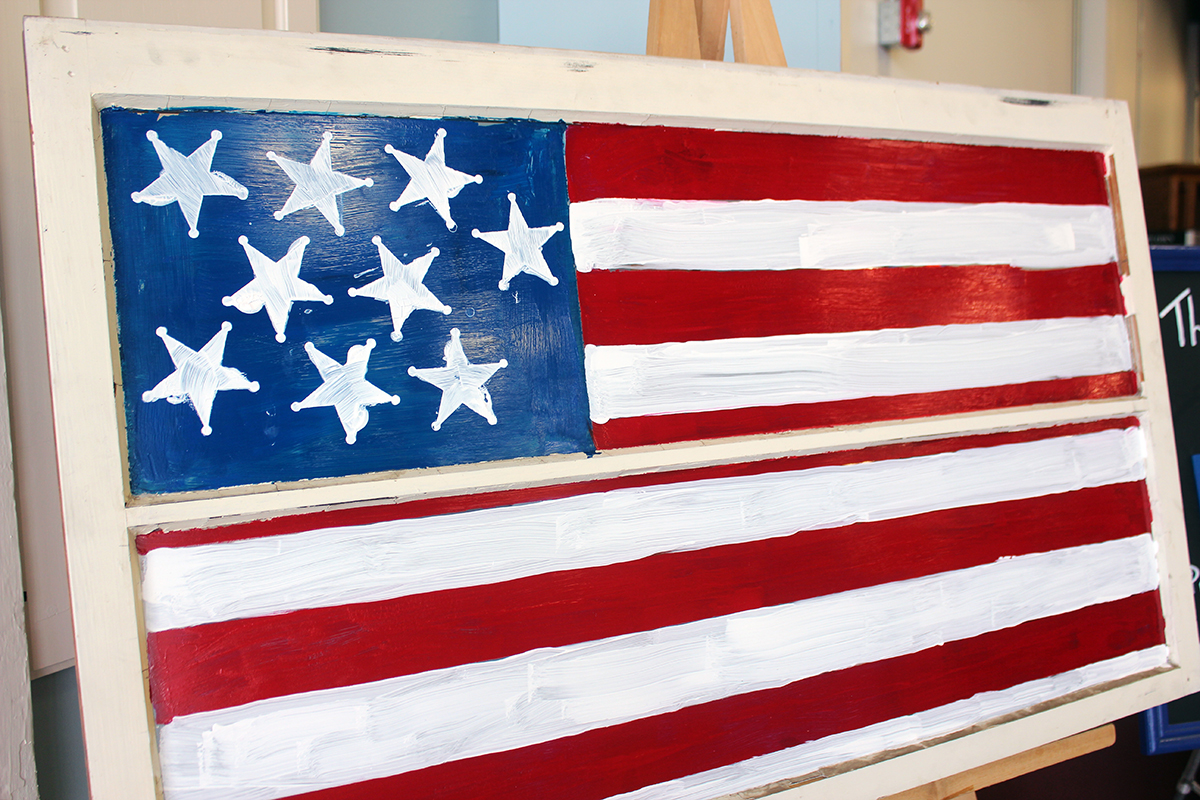
Painted American Flag Window
Supplies
- An old window
- Paint
- Paint brushes
- Mod Podge
- (Optional) Painter’s tape
- (Optional) Star stencil
- (Optional) X-acto knife
Instructions
- Print a star, about 1” tall on cardstock, and cut it out with an x-acto knife. If you do not wish to use a stencil, you can paint the stars free-hand.
- Tape the frame of your window to avoid paint messes. (Optional)
- Paint stars on the upper right-hand side of the back of the window. Be sure it is the upper right-hand side, and on the back side of the window. This ensures the stars are the correct direction when finished. Allow the paint to dry completely.
- Lightly paint blue over top of the stars. This is your background. Do not try to paint over the same spot while it is wet—it will take off your stars! Allow to dry completely, and paint a second coat if needed.
- Paint on the stripes, alternating red and white. Allow to dry completely and apply a second coat if needed.
- Paint a coating of Mod Podge onto the painted portions of the window. This will seal the paint, and prevent chipping from the weather if you plan to decorate with this piece outside.
- If you taped the outside of your frame, take it off after all of the paint is dry.
- Find a good spot for your American Flag Painted Window for everyone to admire!
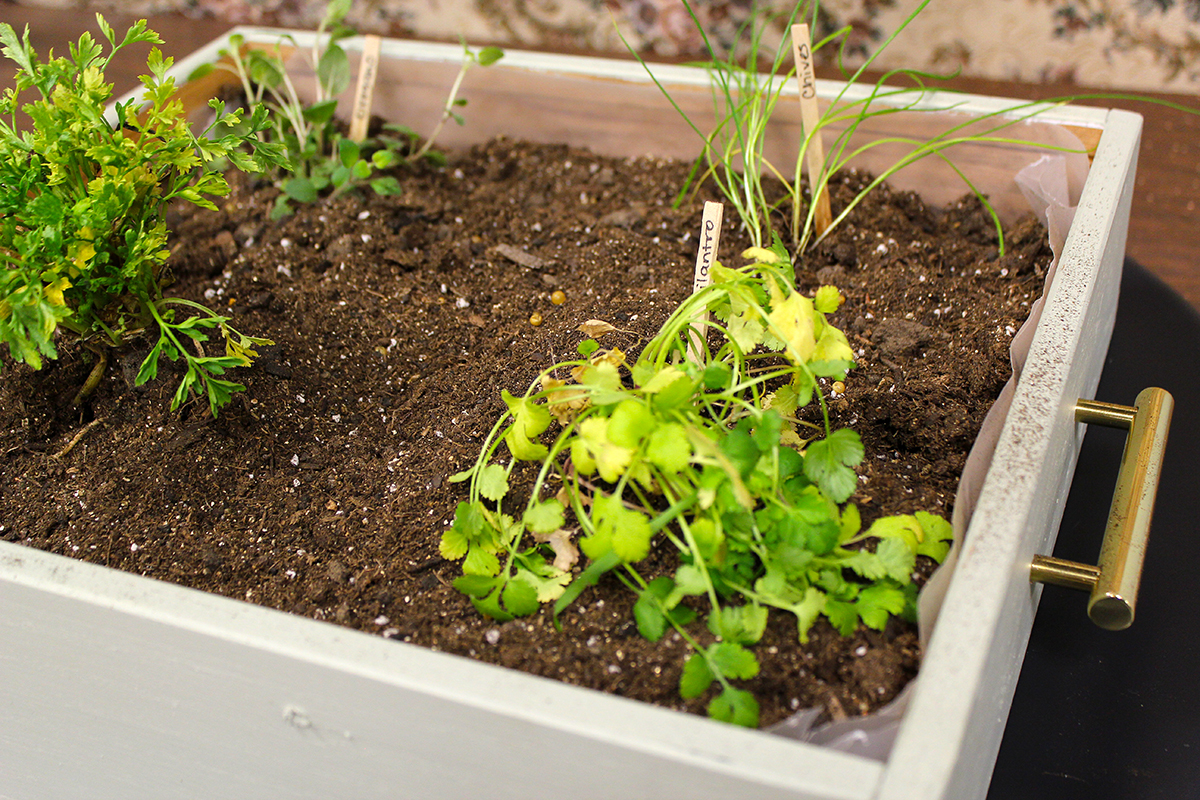
Herb Garden Drawer
Supplies
- Wooden drawer
- Primer
- Paint
- Brushes
- Power drill
- Potting soil
- Herbs/flowers
- (Optional) Plastic (trash bag/plastic drop cloth)
- (Optional) Drawer handle(s)
- (Optional) Scissors/box cutter
Instructions
- Drill holes in bottom of drawer. Mark holes for handles and drill holes.
- Prime and paint outside of drawer; let dry.
- Measure out enough plastic to fit inside of drawer. Put plastic inside drawer and let extra plastic hang over top. Poke holes in plastic to match up to the holes you drilled. Alternatively, you can use latex paint on the inside of the drawer. This helps protect the wood from rotting.
- Using your drill, attach the handle.
- Pour soil into drawer and spread evenly. Trim plastic (if using).
- Begin putting your herbs/flowers in soil. Add soil as needed.
- Enjoy your newly made garden and remember to water!
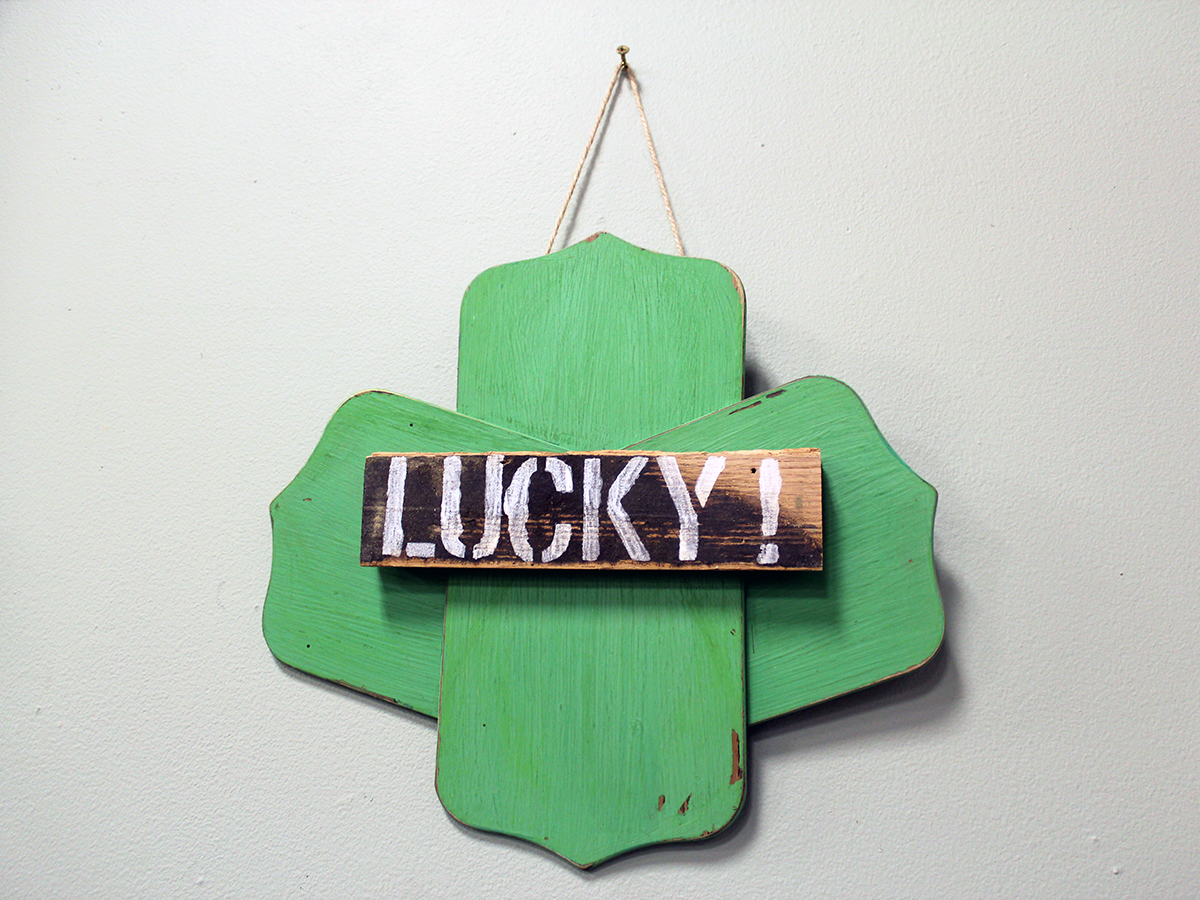
Shamrock Fan Blade Sign
Supplies
- 4 fan blades cut to your desired length
- Small piece of trim
- Paint
- Sandpaper
- Twine
- 2 Screws
- Glue
- Stencil
Instructions
- Sand and paint fan blades and allow to dry.
- If desired, brush a little black paint on trim and let dry.
- Using your stencil, paint word (“lucky”) onto trim and let dry. You can rough up the paint if desired.
- Glue fan blades together into shape shown. Attach trim to front, making sure to cover the seam, and let dry.
- Attach two screws to the back, tie on twine and hang.
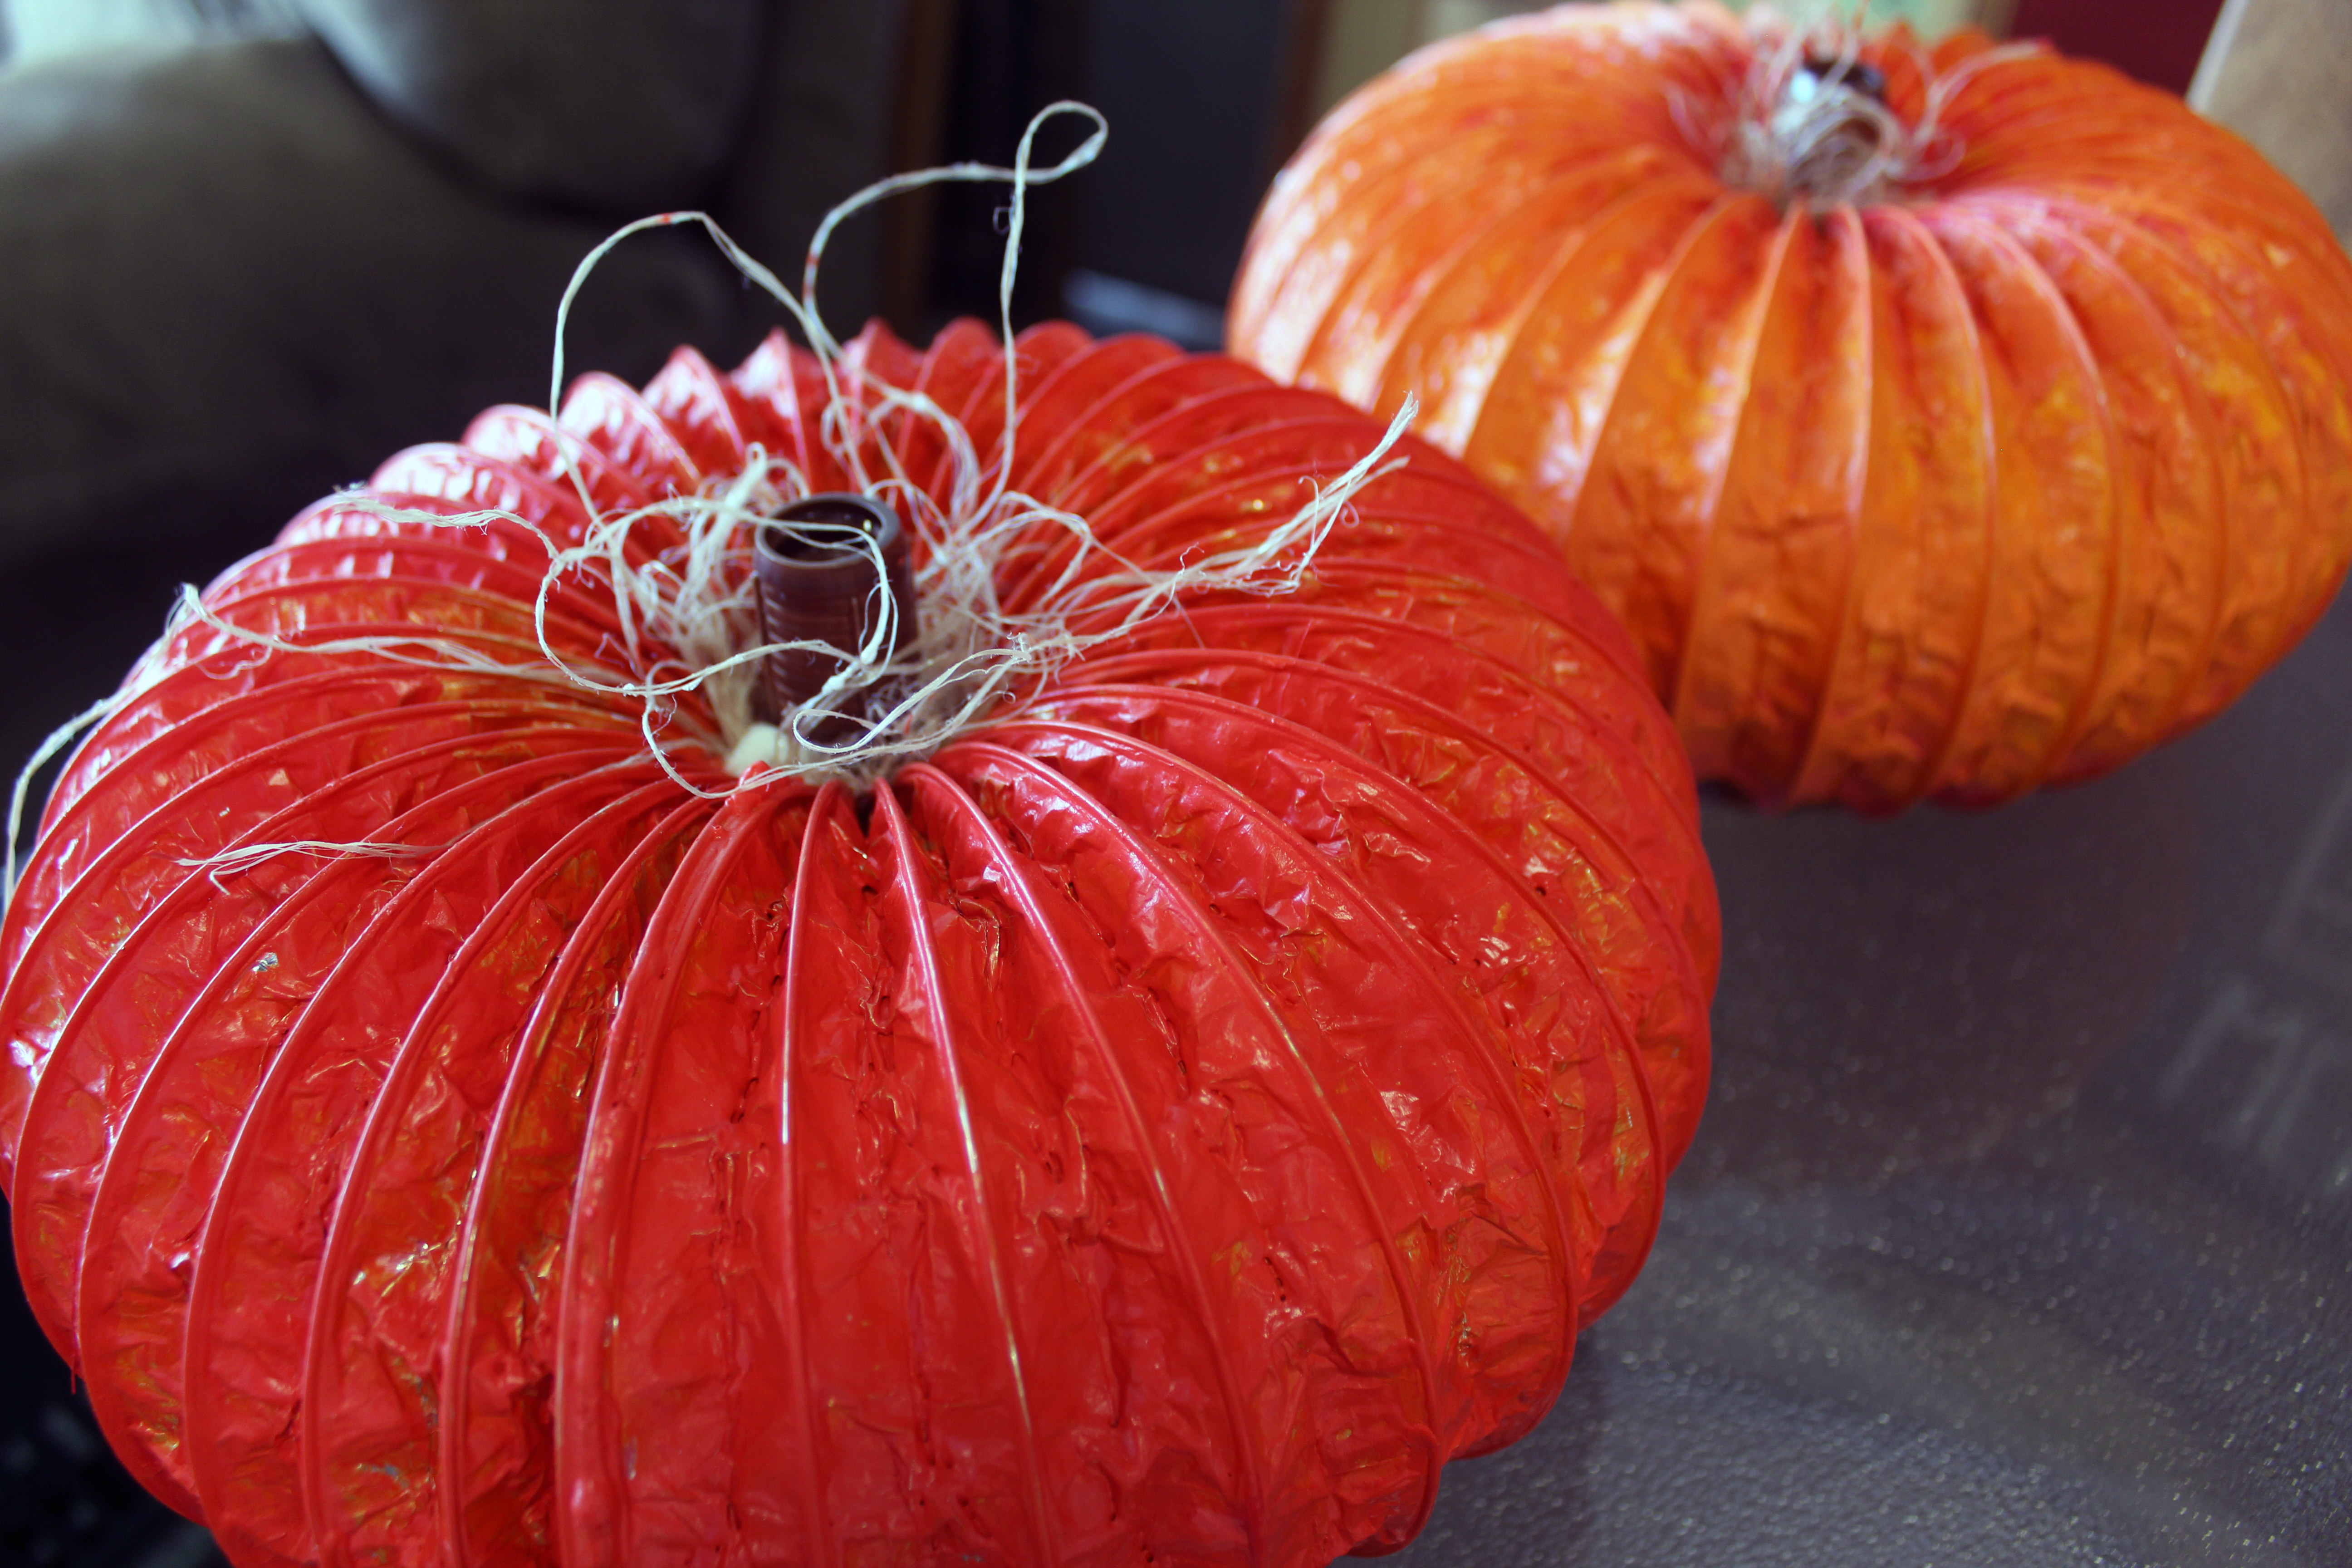
Dryer Duct Pumpkin
Supplies
- Dryer duct
- Paint
- Twine
- Wooden dowel
- Glue
Instructions
- Measure a piece of dryer duct so that it’s long enough for a circle, plus a couple extra inches.
- Glue the ends together and let dry.
- Paint in your desired color and let dry.
- Glue on your “stem” (wooden dowel) and twine.
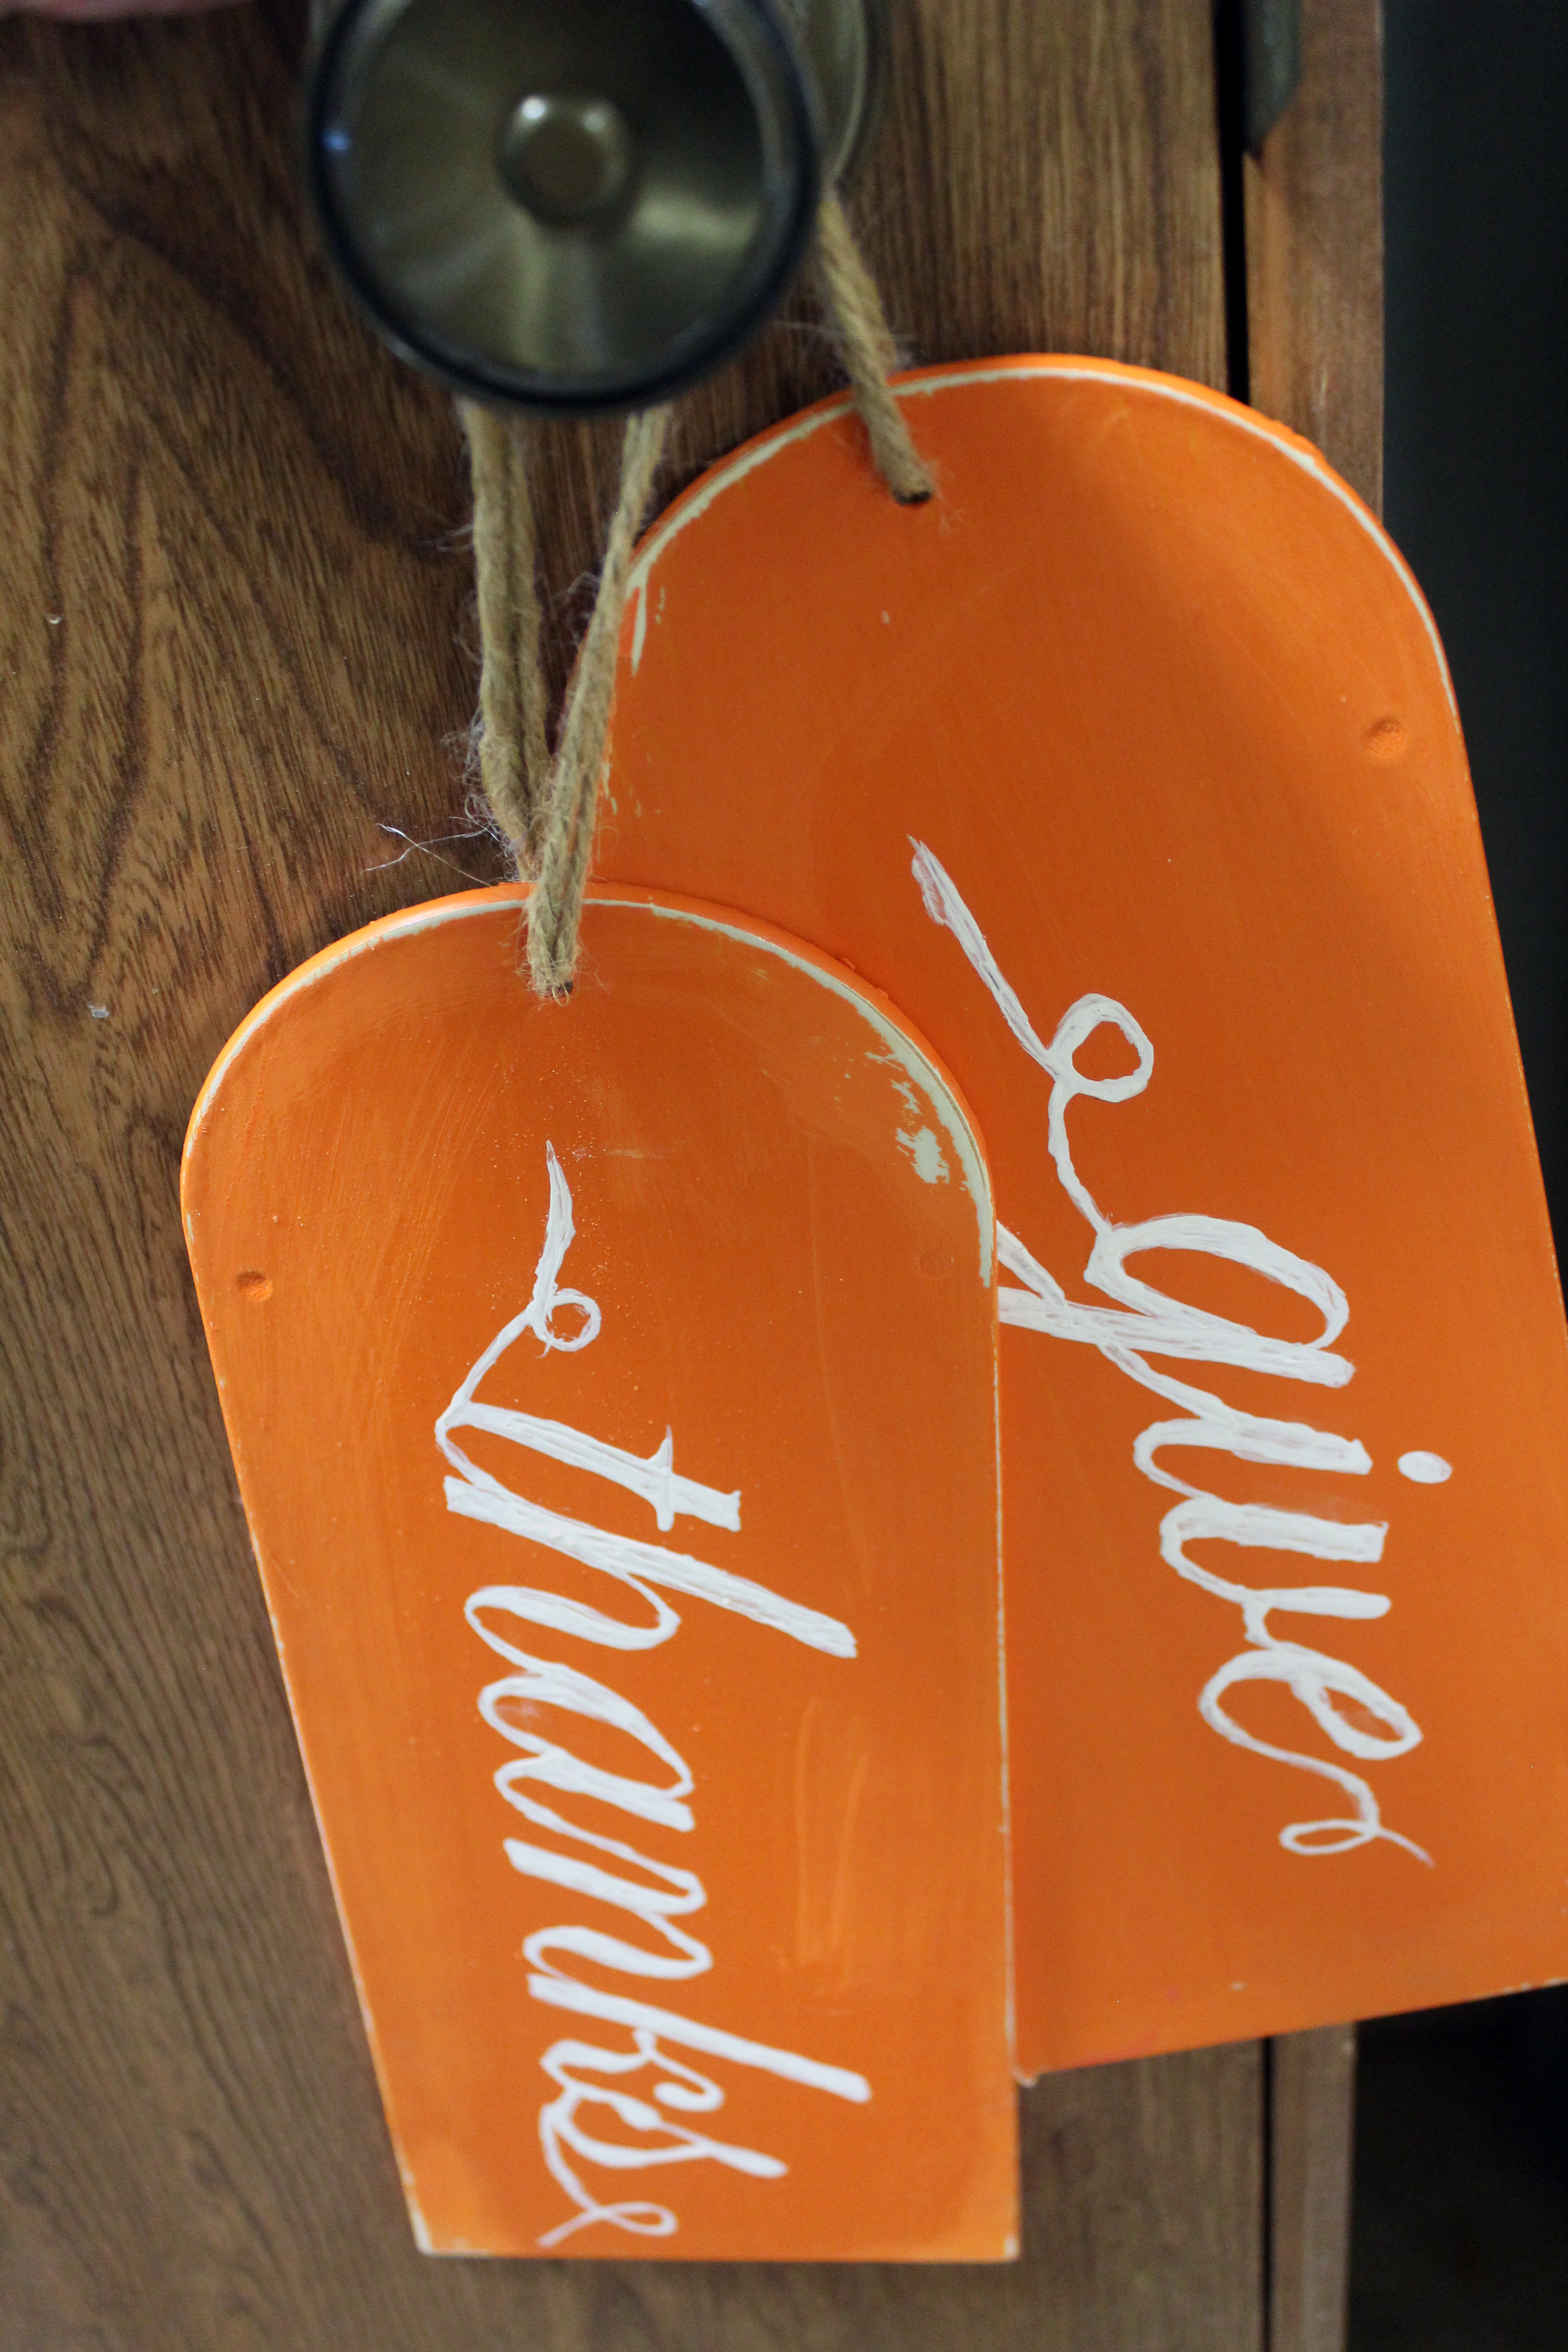
‘Give Thanks’ Door Hang
Supplies
- 2 fan blades cut to your desired length
- Sand paper
- Paint
- Twine
- Stencil
Instructions
- Sand and paint fan blades and allow to dry.
- Print out words to fit (we used Edwardian at 550 pt. font).
- Using a ball point pen, trace letters onto fan blade.
- Paint on (and in) the indent left by the pen in the wood and let dry. You can rough up the paint if desired.
- Tie together with twine and hang.
Rustic Scrap Wood Christmas Tree
Instructions
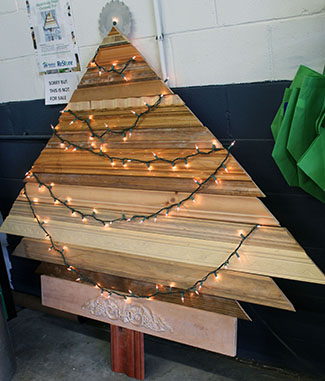
- Gather pieces of scrap wood and trim. Cut to different lengths as needed.
- Level and center your bottom piece of wood on the “stump” and attach it with nails.
- Add each additional piece, making sure the top one covers the end of the “stump.”
- Cut your own star for the top or get creative like we did!
This project idea was adapted from one by Dukes & Duchesses. To see the full tutorial, check us out on Pinterest!